AwesomeWM: Difference between revisions
m (Remove some obsolete/unavailable or just plain nonsensical drivers. Use ic and pkg templates as appropriate. Have setup-xorg-base as a prerequisite..) |
Prabuanand (talk | contribs) (rearranged headings and added Include:Desktop prerequisites) |
||
| Line 2: | Line 2: | ||
{{TOC right}} | {{TOC right}} | ||
{{:Include:Desktop prerequisites}} | |||
= Install | == Installation == | ||
Install awesome, xterm and terminus font. | |||
Install X11 and set it up using the <code>setup-xorg-base</code> script.{{Cmd|# setup-xorg-base}} | |||
{{Cmd|# apk add {{pkg|awesome|arch=}} {{pkg|xterm|arch=}} {{pkg|font-terminus|arch=}}}} | |||
Install awesome, xterm and terminus font. {{Cmd|# apk add {{pkg|awesome|arch=}} {{pkg|xterm|arch=}} {{pkg|font-terminus|arch=}}}} | |||
=== Video and Input packages === | === Video and Input packages === | ||
You <u>might</u> want to install a package suitable for your video chipset and input devices.<BR> | You <u>might</u> want to install a package suitable for your video chipset and input devices.<BR> | ||
| Line 22: | Line 18: | ||
Run {{ic|apk search {{pkg|xf86-input*|arch=}}}} to see available xf86-input packages.<BR> | Run {{ic|apk search {{pkg|xf86-input*|arch=}}}} to see available xf86-input packages.<BR> | ||
===VMWare Users=== | === VMWare Users === | ||
{{Cmd|# apk add {{pkg|xf86-video-vmware|arch=}}}} | {{Cmd|# apk add {{pkg|xf86-video-vmware|arch=}}}} | ||
and/or | and/or | ||
| Line 31: | Line 27: | ||
{{Cmd|# rc-update add acpid}} | {{Cmd|# rc-update add acpid}} | ||
= | == Start your desktop == | ||
= Start your desktop = | |||
{{Cmd|$ echo 'awesome' >> /home/<newuser>/.xinitrc}} | {{Cmd|$ echo 'awesome' >> /home/<newuser>/.xinitrc}} | ||
{{Cmd|$ mkdir /home/<newuser>/.config}} | {{Cmd|$ mkdir /home/<newuser>/.config}} | ||
| Line 44: | Line 36: | ||
{{Cmd|$ startx}} | {{Cmd|$ startx}} | ||
= Troubleshooting = | == Troubleshooting == | ||
D-Bus problems: | D-Bus problems: | ||
| Line 60: | Line 52: | ||
Now if startx is launched, it should load the desktop correctly | Now if startx is launched, it should load the desktop correctly | ||
= See also = | == See also == | ||
* [[ | * [[Xorg]] | ||
[[Category:Desktop]] | [[Category:Desktop]] | ||
[[Category:Window Managers]] | [[Category:Window Managers]] | ||
Revision as of 06:26, 9 January 2025

- Internet connectivity, unless the packages have been pre-fetched into a local cache.
- Install appropriate Graphics driver drivers for your hardware. Without graphics drivers, errors are likely to occur when starting your desktop.
- A non-root user account with appropriate groups for desktop usage.
- The community repository must be enabled.
- Set up eudev.
- Install and enable D-Bus. Without D-Bus, icons and keyboard shortcuts may be missing.
Installation
Install X11 and set it up using the setup-xorg-base script.
# setup-xorg-base
Install awesome, xterm and terminus font.
# apk add awesome xterm font-terminus
Video and Input packages
You might want to install a package suitable for your video chipset and input devices.
For example:
# apk add xf86-input-synaptics
Run apk search xf86-video* to see available xf86-video packages.
Run apk search xf86-input* to see available xf86-input packages.
VMWare Users
# apk add xf86-video-vmware
and/or
# apk add xf86-input-vmmouse
acpid
If you installed your Alpine Linux as a VirtualBox or VMWare guest, you might find it handy to be able execute an ACPI shutdown.
# rc-update add acpid
Start your desktop
$ echo 'awesome' >> /home/<newuser>/.xinitrc
$ mkdir /home/<newuser>/.config
$ cp -r /etc/xdg/awesome /home/<newuser>/.config
$ vi /home/<newuser>/.config/awesome/rc.lua
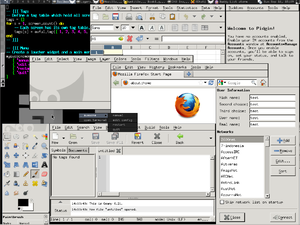
Start awesome.
$ startx
Troubleshooting
D-Bus problems:
D-Bus library appears to be incorrectly set up; failed to read machine uuid: Failed to open "/var/lib/dbus/machine-id": No such file or directory
If startx fails and returns an error about D-Bus failed to read machine uuid, as shown above, proceed as follows:
Install dbus from apk (you must be logged in as root for the step shown below)
# apk add dbus
Log in or su to the root account, then launch the following command (Note: sudo does not work for this step):
# dbus-uuidgen > /var/lib/dbus/machine-id
Now if startx is launched, it should load the desktop correctly