S390x: Difference between revisions
No edit summary |
No edit summary |
||
| Line 2: | Line 2: | ||
= The installer = | = The installer = | ||
For KVM, both ISO image and netboot installer (kernel and initramfs) are supported. | |||
For z/VM, netboot installer is supported. | |||
For LPAR, not yet supported. | |||
Installer media are found at: | |||
* http://dl-cdn.alpinelinux.org/alpine/v3.8/releases/s390x/ | |||
== Kernel parameters (and parmfile) == | == Kernel parameters (and parmfile) == | ||
| Line 30: | Line 37: | ||
<code>modloop=</code> : the remote location of the image containing kernel's modules, required for LVM and raid setup. | <code>modloop=</code> : the remote location of the image containing kernel's modules, required for LVM and raid setup. | ||
:The remote location of the <code>modloop</code> image is the same as the kernel and initramfs (see below) | :The remote location of the <code>modloop</code> image is the same as the kernel and initramfs (see below). | ||
<code>ssh_key=</code> : the remote location of your SSH public key which is used to allow SSH connection into the installer. It will be downloaded and copied into <code>/root/.ssh/authorized_keys</code> in the installer. | <code>ssh_key=</code> : the remote location of your SSH public key which is used to allow SSH connection into the installer. It will be downloaded and copied into <code>/root/.ssh/authorized_keys</code> in the installer. | ||
{{Note|Fetching public keys from HTTPS and FTPS are supported. HTTP | {{Note|Fetching public keys from HTTP, HTTPS and FTPS are supported. HTTP should only be used in local development network where you own the network.}} | ||
{{Note|Alpine Linux security policies are against using passwords for root access via SSH as we consider using public-private key pairs is a much better approach.}} | {{Note|Alpine Linux security policies are against using passwords for root access via SSH as we consider using public-private key pairs is a much better approach.}} | ||
| Line 48: | Line 55: | ||
= Pre-installation = | = Pre-installation = | ||
== KVM == | == KVM == | ||
Create a virtual disk: | Create a virtual disk: | ||
$ qemu-img create alpine_disk.qcow2 5G | $ qemu-img create alpine_disk.qcow2 5G | ||
==== Using iso image ==== | |||
Download latest iso image from : http://dl-cdn.alpinelinux.org/alpine/v3.8/releases/s390x | |||
Start qemu: | |||
$ qemu-system-s390x -M s390-ccw-virtio \ | |||
-m 2048 -smp 2 -nographic -enable-kvm \ | |||
-hda alpine_disk.qcow2 \ | |||
-net nic -net tap,ifname=tap0,script=no' | |||
-boot d -cdrom alpine-standard-3.8.0_rc8-s390x.iso | |||
==== Using netboot installer ==== | |||
Download the latest [http://dl-cdn.alpinelinux.org/alpine/v3.8/releases/s390x/netboot-3.8.0_rc8/vmlinuz-vanilla kernel] and [http://dl-cdn.alpinelinux.org/alpine/v3.8/releases/s390x/netboot-3.8.0_rc8/initramfs-vanilla initramfs]. | |||
Start qemu: (modify <code>ip=</code> <code>alpine_repo=</code> <code>ssh_key=</code> for your needs) | Start qemu: (modify <code>ip=</code> <code>alpine_repo=</code> <code>ssh_key=</code> for your needs) | ||
| Line 63: | Line 83: | ||
-kernel vmlinuz-vanilla \ | -kernel vmlinuz-vanilla \ | ||
-initrd initramfs-vanilla \ | -initrd initramfs-vanilla \ | ||
-append "ip=192.168.1.2::192.168.1.1:255.255.255.0:none:eth0:none:8.8.8.8 alpine_repo=http://dl-cdn.alpinelinux.org/alpine/v3.8/main modloop=http://dl-cdn.alpinelinux.org/alpine/v3.8/releases/s390x/netboot-3.8. | -append "ip=192.168.1.2::192.168.1.1:255.255.255.0:none:eth0:none:8.8.8.8 alpine_repo=http://dl-cdn.alpinelinux.org/alpine/v3.8/main modloop=http://dl-cdn.alpinelinux.org/alpine/v3.8/releases/s390x/netboot-3.8.0_rc8/modloop-vanilla ssh_key=https://your-website.com/your-ssh-key.pub" | ||
{{Note|If you have direct access to the qemu console, <code>ssh_key</code> might not be required.}} | |||
== z/VM == | == z/VM == | ||
| Line 74: | Line 95: | ||
<pre> | <pre> | ||
ZNETBOOT_KERNEL=http://dl-cdn.alpinelinux.org/alpine/v3.8/releases/s390x/netboot-3.8. | ZNETBOOT_KERNEL=http://dl-cdn.alpinelinux.org/alpine/v3.8/releases/s390x/netboot-3.8.0_rc8/vmlinuz-vanilla | ||
ZNETBOOT_INITRD=http://dl-cdn.alpinelinux.org/alpine/v3.8/releases/s390x/netboot-3.8. | ZNETBOOT_INITRD=http://dl-cdn.alpinelinux.org/alpine/v3.8/releases/s390x/netboot-3.8.0_rc8/initramfs-vanilla | ||
ZNETBOOT_PROGRESS=1M | ZNETBOOT_PROGRESS=1M | ||
alpine_repo=http://dl-cdn.alpinelinux.org/alpine/v3.8/main | alpine_repo=http://dl-cdn.alpinelinux.org/alpine/v3.8/main | ||
modloop=http://dl-cdn.alpinelinux.org/alpine/v3.8/releases/s390x/netboot-3.8. | modloop=http://dl-cdn.alpinelinux.org/alpine/v3.8/releases/s390x/netboot-3.8.0_rc8/modloop-vanilla | ||
dasd=0.0.04c0,0.0.05d1 | dasd=0.0.04c0,0.0.05d1 | ||
| Line 88: | Line 109: | ||
</pre> | </pre> | ||
==== Upload to z/VM system via 3270 client ==== | ==== Upload to z/VM system via 3270 client ==== | ||
| Line 97: | Line 117: | ||
Upload 3 files <code>alpine.znetboot</code>, <code>znetboot.exec</code>, <code>curl.rexx</code> to the z/VM environment using the 3270 client (this tutorial uses x3270). On the top left corner, click "File", then "File Transfer". (Figure 1.) | Upload 3 files <code>alpine.znetboot</code>, <code>znetboot.exec</code>, <code>curl.rexx</code> to the z/VM environment using the 3270 client (this tutorial uses x3270). On the top left corner, click "File", then "File Transfer". (Figure 1.) | ||
Do following steps : (Figure 2.) [[File:X3270-2.png|right|300px|thumb|Figure 2.]] | Do following steps : (Figure 2.) [[File:X3270-2.png|right|300px|thumb|Figure 2.]] | ||
| Line 114: | Line 133: | ||
Repeat the same steps with <code>znetboot.exec</code> and <code>curl.rexx</code> files. | Repeat the same steps with <code>znetboot.exec</code> and <code>curl.rexx</code> files. | ||
==== (Optional) Check the configuration files ==== | ==== (Optional) Check the configuration files ==== | ||
| Line 126: | Line 144: | ||
or <code>filel</code> and put <code>xedit</code> on CMD column to edit respective file. | or <code>filel</code> and put <code>xedit</code> on CMD column to edit respective file. | ||
==== Start ZNETBOOT ==== | ==== Start ZNETBOOT ==== | ||
| Line 137: | Line 153: | ||
= Installation = | = Installation = | ||
If you install on | If you install on z/VM, steps in this part does not involve the interaction with the 3270 client anymore. Everything is done in the terminal with SSH client. | ||
If you install on | If you install on KVM, you can either SSH into the installer (below) or directly use the console starting qemu. | ||
Either installing in KVM or z/VM environments, from your workstation/laptop, you will be able to run: | Either installing in KVM or z/VM environments, from your workstation/laptop, you will be able to run: | ||
| Line 295: | Line 311: | ||
== Login to new Alpine system == | == Login to new Alpine system == | ||
On your workstation/laptop, use SSH client to login new Alpine system: | On your workstation/laptop, use SSH client to login new Alpine system: | ||
<code> | <code> $ ssh root@192.168.1.2</code> (or whichever ip address you used) | ||
| Line 335: | Line 351: | ||
└─vg0-lv_root 254:1 0 3.9G 0 lvm / | └─vg0-lv_root 254:1 0 3.9G 0 lvm / | ||
</pre> | </pre> | ||
| Line 349: | Line 364: | ||
= Known Issues = | = Known Issues = | ||
1. Installation on 2 or more DASDs (either ECKD and FBA) on z/VM is not supported in the installer script at the moment. If you want to install/extend on more than 1 DASD, see "Extending LVM volume". However, installation on 2 or more virtio (SCSI) disks on KVM are supported just like other architectures. | 1. Installation on 2 or more DASDs (either ECKD and FBA) on z/VM is not supported in the installer script (<code>setup-alpine</code>) at the moment. If you want to install/extend on more than 1 DASD, see [https://wiki.alpinelinux.org/wiki/S390x#Extending_LVM_volume "Extending LVM volume"]. However, installation on 2 or more virtio (SCSI) disks on KVM are supported just like other architectures. | ||
= See more = | = See more = | ||
Running Alpine s390x containers on Docker: https://wiki.alpinelinux.org/wiki/S390x/Docker | Running Alpine s390x containers on Docker: https://wiki.alpinelinux.org/wiki/S390x/Docker | ||
Revision as of 05:23, 22 June 2018
The installer
For KVM, both ISO image and netboot installer (kernel and initramfs) are supported.
For z/VM, netboot installer is supported.
For LPAR, not yet supported.
Installer media are found at:
Kernel parameters (and parmfile)
The Alpine s390x installer requires following kernel parameters to work:
ip=dhcp : use DHCP for network configuration.
ip=client-ip:server-ip:gw-ip:netmask:hostname:device:autoconf:dns1:dns2 : use static IP configuration, each field is separated by a colon :
client-ipip address of the guest VM where we are going to run the installerserver-ipnot used, leave blank or fill withnonegw-ipthe gateway ip addressnetmaskthe netmaskhostnamenot used, leave blank or fill withnonedevicethe network interface of the guest VM, default iseth0if left blankautoconfnot used, leave blank or fill withnoneoroffdns1address of the DNS serverdns2address of the 2nd DNS server
alpine_repo= : the location of the Alpine repository from which packages are downloaded.
- For stable release, use
http://dl-cdn.alpinelinux.org/alpine/v3.8/main
- For rolling release, use
http://dl-cdn.alpinelinux.org/alpine/edge/main
modloop= : the remote location of the image containing kernel's modules, required for LVM and raid setup.
- The remote location of the
modloopimage is the same as the kernel and initramfs (see below).
ssh_key= : the remote location of your SSH public key which is used to allow SSH connection into the installer. It will be downloaded and copied into /root/.ssh/authorized_keys in the installer.
z/VM only
dasd= : the addresses of the DASD devices, either ECKD or FBA DASDs. Each device is separated with a comma.
s390x_net= : the network interface type and its subchannels. At the moment, only QETH layer 2 is supported, thus the name qeth_l2 is used (see below).
Pre-installation
KVM
Create a virtual disk:
$ qemu-img create alpine_disk.qcow2 5G
Using iso image
Download latest iso image from : http://dl-cdn.alpinelinux.org/alpine/v3.8/releases/s390x
Start qemu:
$ qemu-system-s390x -M s390-ccw-virtio \
       -m 2048 -smp 2 -nographic -enable-kvm \
       -hda alpine_disk.qcow2 \
       -net nic -net tap,ifname=tap0,script=no'
       -boot d -cdrom alpine-standard-3.8.0_rc8-s390x.iso
Using netboot installer
Download the latest kernel and initramfs.
Start qemu: (modify ip= alpine_repo= ssh_key= for your needs)
$ qemu-system-s390x -M s390-ccw-virtio \
       -m 2048 -smp 2 -nographic -enable-kvm \
       -hda alpine_disk.qcow2 \
       -net nic -net tap,ifname=tap0,script=no'
       -kernel vmlinuz-vanilla \
       -initrd initramfs-vanilla \
       -append "ip=192.168.1.2::192.168.1.1:255.255.255.0:none:eth0:none:8.8.8.8 alpine_repo=http://dl-cdn.alpinelinux.org/alpine/v3.8/main modloop=http://dl-cdn.alpinelinux.org/alpine/v3.8/releases/s390x/netboot-3.8.0_rc8/modloop-vanilla ssh_key=https://your-website.com/your-ssh-key.pub"
ssh_key might not be required.
z/VM
To ease out the process of downloading the images, punch the readers, ipl, etc., ZNETBOOT is used.
Create the parm file
On your workstation/laptop, create a file named alpine.znetboot in your home directory with contents below (modify dasd=s390x_net= ip= alpine_repo= ssh_key= for your needs)
ZNETBOOT_KERNEL=http://dl-cdn.alpinelinux.org/alpine/v3.8/releases/s390x/netboot-3.8.0_rc8/vmlinuz-vanilla
ZNETBOOT_INITRD=http://dl-cdn.alpinelinux.org/alpine/v3.8/releases/s390x/netboot-3.8.0_rc8/initramfs-vanilla
ZNETBOOT_PROGRESS=1M

alpine_repo=http://dl-cdn.alpinelinux.org/alpine/v3.8/main
modloop=http://dl-cdn.alpinelinux.org/alpine/v3.8/releases/s390x/netboot-3.8.0_rc8/modloop-vanilla

dasd=0.0.04c0,0.0.05d1
s390x_net=qeth_l2,0.0.0560,0.0.0561,0.0.0562
ip=192.168.1.2::192.168.1.1:255.255.255.0:none:eth0:none:8.8.8.8

ssh_key=https://your-website.com/your-ssh-key.pub
Upload to z/VM system via 3270 client

On your workstation/laptop, download 2 files znetboot.exec, and curl.rexx to your home directory.
Open 3270 client and log in the z/VM system with your z/VM username and password.
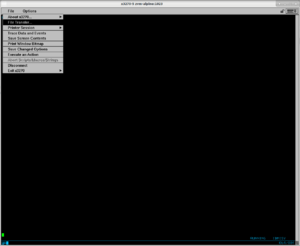
Upload 3 files alpine.znetboot, znetboot.exec, curl.rexx to the z/VM environment using the 3270 client (this tutorial uses x3270). On the top left corner, click "File", then "File Transfer". (Figure 1.)
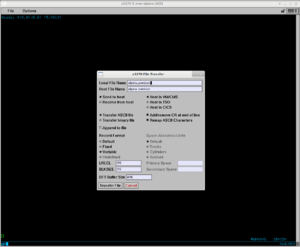
Do following steps : (Figure 2.)

- On "Local File Name" box, enter alpine.znetboot (the file in your laptop/workstation, at ~/alpine.znetboot)
- On "Host File Name" box, enter alpine znetboot (the file will be in z/VM console)
. and the space characters in the file names.- Choose Send to host
- Choose Host is VM/CMS
- Choose either Fixed or Variable for Record Format
- Enter a number for LRECL and BLKSIZE, respectively
- Click Transfer File box
Repeat the same steps with znetboot.exec and curl.rexx files.
(Optional) Check the configuration files
On 3270 client, enter following commands to check if the configuration files are correctly transferred:
xedit alpine znetboot
xedit znetboot exec
xedit curl rex
or filel and put xedit on CMD column to edit respective file.
Start ZNETBOOT
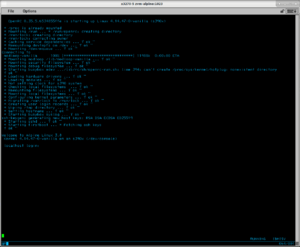
On 3270 client, type below command and wait till Figure 3.:

znetboot alpine
Installation
If you install on z/VM, steps in this part does not involve the interaction with the 3270 client anymore. Everything is done in the terminal with SSH client.
If you install on KVM, you can either SSH into the installer (below) or directly use the console starting qemu.
Either installing in KVM or z/VM environments, from your workstation/laptop, you will be able to run:
$ ssh root@192.168.1.2 (change ip address to what you specified earlier)
Remaining steps are similar to installing Alpine on other architectures (x86, arm, ppc, etc.), either on KVM (using virtio/SCSI disks) or on z/VM with FBA DASDs. Installing on ECKD DASDs requires an additional step, as described below.
Example
Below is the detailed walkthrough of installing Alpine on a single ECKD DASD using LVM and extend that LVM to the second ECKD DASD.
After SSH-ing into the Alpine installer, run:
# setup-alpine
Select keyboard layout [none]:
- press Enter for none
Enter system hostname (short form, e.g. 'foo') [localhost]:
- enter your hostname
Available interfaces are: eth0.
Enter '?' for help on bridges, bonding and vlans.
Which one do you want to initialize? (or '?' or 'done') [eth0]:
- type 'eth0' or press Enter
Ip address for eth0? (or 'dhcp', 'none', '?') [192.168.1.2]
- enter ip address or 'dhcp'
Netmask? [255.255.255.0]
- enter netmask
Gateway? (or 'none') [192.168.1.1]
- enter gateway's ip address
Do you want to do any manual network configuration? [no]
- enter 'no' or press Enter
DNS domain name? (e.g 'bar.com') []
- enter domain name or press Enter for none
DNS nameserver(s)? [8.8.8.8 ]
- enter DNS nameserver
Changing password for root
- enter root password
Which timezone are you in? ('?' for list) [UTC]
- enter timezone or '?' for list of timezones
HTTP/FTP proxy URL? (e.g. 'http://proxy:8080', or 'none') [none]
- enter proxy or press Enter for none
Enter mirror number (1-27) or URL to add (or r/f/e/done) [f]:
- enter a number or 'r' or 'f' or 'e' or 'done' as described
Which SSH server? ('openssh', 'dropbear' or 'none') [openssh]
- enter SSH server or press Enter for openssh
Which NTP client to run? ('busybox', 'openntpd', 'chrony' or 'none') [chrony]
- enter 'busybox' or press Enter for chrony
(next step is the additional step for ECKD DASDs on z/VM)
Available ECKD DASD(s) are:
  0.0.04c0	(3390/0c 3990/e9 IBM)
  0.0.05d1	(3390/0c 3990/e9 IBM)
Which ECKD DASD(s) would you like to be formatted using dasdfmt? (enter '?' for help) [all]
- enter 'all' or '0.0.04c0 0.0.05d1' (separated by a space) to format all/both DASDs
- enter '0.0.04c0' or '0.0.05d1' to format respective DASD
- enter '?' for help
WARNING: Erase ECKD DASD 0.0.04c0? [y/N]:
- enter 'y' to format
Available disks are:
  dasda	(2.5 GB IBM 0.0.04c0)
Which disk(s) would you like to use? (or '?' for help or 'none') [dasda]
- enter 'dasda' or press Enter
The following disk is selected:
  dasda	(2.5 GB IBM 0.0.04c0)
How would you like to use it? ('sys', 'data', 'lvm' or '?' for help) [?]
- enter 'lvm'
The following disk is selected (with LVM):
  dasda	(2.5 GB IBM 0.0.04c0)
How would you like to use it? ('sys', 'data' or '?' for help) [?]
- enter 'sys' to install Alpine on disk
WARNING: The following disk(s) will be erased:
  dasda	(2.5 GB IBM 0.0.04c0)
WARNING: Erase the above disk(s) and continue? [y/N]:
- enter 'y'
Installation is complete. Please reboot.
- the installation is finished
At this point, don't poweroff the installer right away. Go to "Copying SSH keys to new Alpine system" (below) to have SSH access to your new Alpine system.
Copying SSH keys to new Alpine system
By default, Alpine disables root login with a password via SSH. SSH keys are used instead.
After the installer's done running (Installation is complete. Please reboot.), there are 2 ways to copy your SSH key into the new Alpine system:
- Option 1: mount the installed disk and copy the SSH keys while still at the installer's terminal
- Option 2: poweroff the installer, start the new Alpine system and directly add the SSH keys
- if you install on KVM, boot the new Alpine system on qemu, and copy the SSH keys
- if you install on z/VM, use the 3270 client to ipl the new Alpine system and copy the SSH keys
Option 1
If you use 'lvm' + 'sys' installation (like in above example), do:
# mount /dev/vg0/lv_root /mnt
# cp -ar /root/.ssh /mnt/root
If you use 'sys' (without LVM) installation, do:
# mount /dev/dasda3 /mnt(change dasda to dasdb or dasdc, etc. for whichever DASD you chose)
# cp -ar /root/.ssh /mnt/root
Then run # poweroff.
Go to "Login to new Alpine system"
Option 2
Run # poweroff.
If you use KVM, start qemu with new Alpine system (removing -kernel, -initrd, -append options)
If you use z/VM, open the 3270 client, login with your z/VM username and password. You may need to run ipl cms. Then run ipl 04c0 (or whichever DASD device you chose as root disk in earlier steps).
Wait for new Alpine system go up, then login as root user while in the qemu console (on KVM) or 3270 client (on z/VM). Then run:
# mkdir /root/.ssh# wget https://your-website.com/your-ssh-key.pub -O /root/.ssh/authorized_keys# chmod 700 /root/.ssh# chmod 600 /root/.ssh/authorized_keys
Go to "Login to new Alpine system"
Login to new Alpine system
On your workstation/laptop, use SSH client to login new Alpine system:
$ ssh root@192.168.1.2 (or whichever ip address you used)
Extending LVM volume
After logging in to your new Alpine system, run:
# apk add -q util-linux e2fsprogs-extra

# lsblk
NAME            MAJ:MIN RM  SIZE RO TYPE MOUNTPOINT
dasda            94:0    0  2.3G  0 disk
├─dasda1         94:1    0  100M  0 part /boot
└─dasda2         94:2    0  2.2G  0 part
  ├─vg0-lv_swap 254:0    0  588M  0 lvm  [SWAP]
  └─vg0-lv_root 254:1    0  1.6G  0 lvm  /
dasdb            94:4    0  2.3G  0 disk

# dasdfmt -b 4096 -d cdl -yp /dev/dasdb

# fdasd -a /dev/dasdb

# pvcreate /dev/dasdb1

# vgextend vg0 /dev/dasdb1

# lvextend -l +100%FREE /dev/vg0/lv_root

# resize2fs /dev/vg0/lv_root

# lsblk
NAME            MAJ:MIN RM  SIZE RO TYPE MOUNTPOINT
dasda            94:0    0  2.3G  0 disk
├─dasda1         94:1    0  100M  0 part /boot
└─dasda2         94:2    0  2.2G  0 part
  ├─vg0-lv_swap 254:0    0  588M  0 lvm  [SWAP]
  └─vg0-lv_root 254:1    0  3.9G  0 lvm  /
dasdb            94:4    0  2.3G  0 disk
└─dasdb1         94:5    0  2.3G  0 part
  └─vg0-lv_root 254:1    0  3.9G  0 lvm  /
Tips
If you want to disable swap partition, after finishing NTP client step, quit the installer by pressing Ctrl + C. Then run following command to complete remaining steps:
# setup-disk -s 0
Known Issues
1. Installation on 2 or more DASDs (either ECKD and FBA) on z/VM is not supported in the installer script (setup-alpine) at the moment. If you want to install/extend on more than 1 DASD, see "Extending LVM volume". However, installation on 2 or more virtio (SCSI) disks on KVM are supported just like other architectures.
See more
Running Alpine s390x containers on Docker: https://wiki.alpinelinux.org/wiki/S390x/Docker